You know those projects that you start, put down, forget about, rediscover several months later, continue, put down, forget about (repeat 8, 000x’s)??? No? Really? Well, sadly, I am very familiar with these. So is my mom. Maybe its genetic.
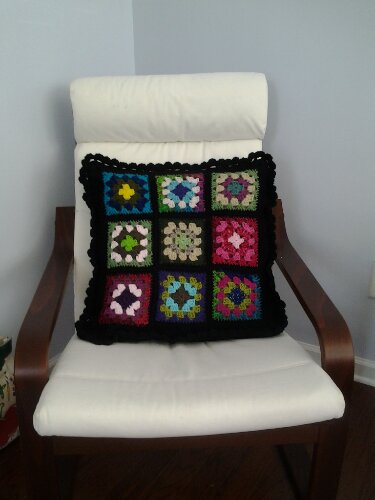
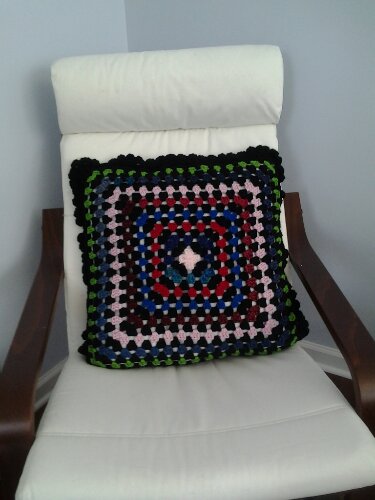
Anyhoo, about a year ago, I looked at the gigantic pile of scrap yarn that the horder in me said, “keep!”, and decided that I would granny square it away. A plan. A truckload of scrap yarn and a plan. That’s how it started.
I got about halfway through the ever-replenishing scrap yarn pile, and decided that I had made enough squares. Recently (about 4 months ago), I discovered those squares and decided that I was going to re-cover an old pillow. Another plan 🙂
I will spare you the rest of the tedious timeline and just show you that I finally finished my pillow today and I love it!
What project have you been putting off? I’d love to see!
repurpose
Awesome Free Tutorial Site!!
I found this wonderful link on Pinterest! Yea!!! So many adorable free patterns/tutorials. I had been trying to figure out what to do with some vintage fabric (yes, really vintage leftover fabric from one of my mom’s old dresses) that was in my stash. This little Snappy Toddler Dress used up the perfect amount and turned out so cute!!! The pattern on the site was for a baby (12-18 months), so I just used the back neckline from the pattern as the front neckline for my 5 1/2 year old and created a new back neckline to fit her. The rest was easy! What do you think???
Next on my list is that adorable Snap Wrap Dress that’s on there…and probably a few more of these tops 🙂 I’m sure I’ll have to adjust a little to accommodate for my daughter’s age/size, but that is a simple fix.
Loooove these simple tops! Thank you Prudent Baby!!!
I know I love you because of this toilet paper…
I can’t say that I came from an outragously wealthy family or anything, but growing up, we always had really nice toilet paper. I never realized this until I started dating my husband (well, now he’s my husband, then he was just a guy that used bad TP). Anyway, when people first start dating–I can generalize here because I know everyone does it–we adopt certain things that our partners like. Sometimes it’s music, sometimes clothing…but for some reason, for me, it was toilet paper. It was a gradual adoption. After we moved in together, I resisted. I still bought good paper for the bathrooms that I used and his less reliable brand for him. At some point though, I lost all hope for him. In his head, he had put this thin, falling apart toilet paper on a pedestal (probably one shaped like a golden toilet). It was the best, and no amount of brainwashing would change his mind. I gave in. I’ve now been using that brand for nearly 10 years. I’m not proud of this. And don’t worry, this post is going somewhere crafty. Soooo, as I restocked the paper the other day, I looked on the back of our toilet where there was a stack of magazines piled up. I thought to myself, “I will use this paper, but gosh darnnit, I am going to have a magazine rack!”
A few years ago, I bought this little “ball holder” from Target’s dollar spot (love that part of the store!) and we used it for a long time in my old house. Eventually it made its way out to the back porch, the fabric got moldy, and then when we moved this past fall, it found a permanent home in our new garage…until yesterday.

I used the old fabric as a “pattern” and cut 2 coordinating pieces of some extra duck cloth that I had from another project.

Next, I covered the table (warning: don’t do this when you’re hungry or you will be craving Hardee’s ice cream sandwiches during the whole rest of the project) and cleaned off the old rack with a clorox wipe.

I used some paint that my neighbor gave to me to try out and painted the old frame a “bluish” white. Thanks Christina!

I pinned the 2 pieces of duck cloth together (right sides facing) and sewed about 1/4″ around 3 of the sides leaving one short side open so that I can turn it inside out.

I, being a crazy smart person who doesn’t fully think out projects ahead of time, sewed one side on to the rack itself then got stuck with the other side. I ended up making 2 button holes and attaching buttons to the other side. Save yourself the trouble. Do buttons on both sides!
AND…THE FINAL PROJECT IN IT’S NEW HOME!!!! It almost makes the toilet paper tolerable 🙂


